Adding the calendar of your city or autonomous community in TramitApp is very simple.
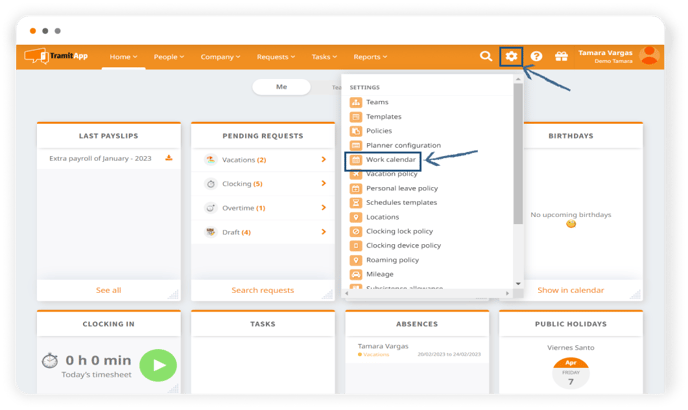
By adding the calendar of your city or autonomous community to your company, we will inform the platform of the holidays that your company has. To do this, we must click on the Configuration wheel ⚙️ > Work Calendar.
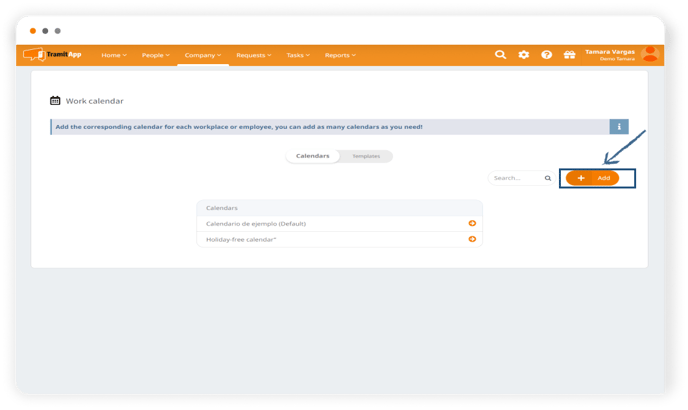
In this new window, we select "Add". We must keep in mind that fields with an asterisk are mandatory.
 Without them, or with any of them left blank, the calendar cannot be saved. We enter a name to identify it, for example: "Utebo". If we have an internal ID in our company that defines this labor calendar, we can add it here. We select the parent calendar by clicking here: our employees correspond to the holidays of Utebo, so we search for this locality. If you can't find the locality you need in the drop-down menu, it is because it is not yet informed in our database. In that case, contact the TramitApp Customer Success department so we can add it.
If you want to indicate company holidays, you can do so through a holiday template. We advise you to review the post "How to create holiday templates" for more information. Click "Add" and the calendar will be saved.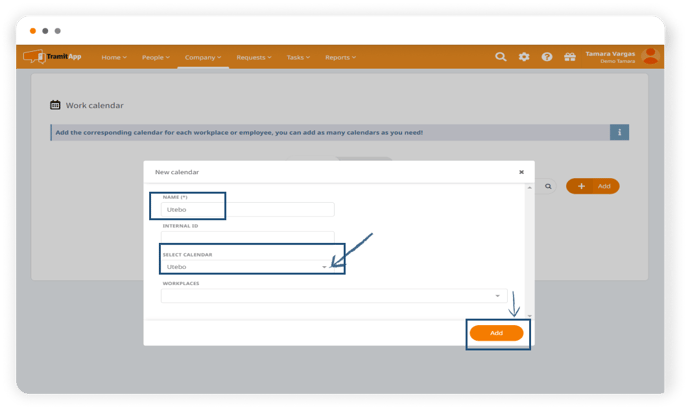
How to assign the calendar. Now let's see how to assign the calendar with different possibilities:
-
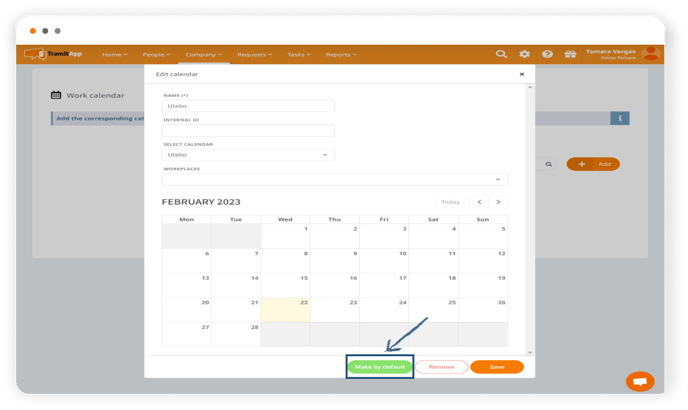
We can set it as the default calendar for the company by clicking on "Set as default" so that everyone is assigned the same calendar.
-
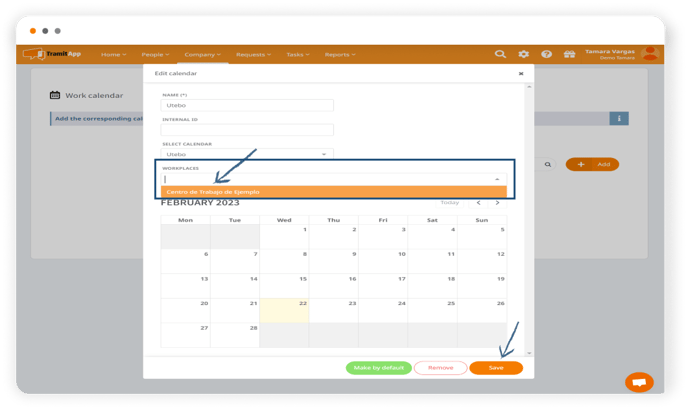
We can assign it to a specific Workplaces. This way, all employees who are part of this workcplaces will have this calendar assigned, replacing the default calendar.
-
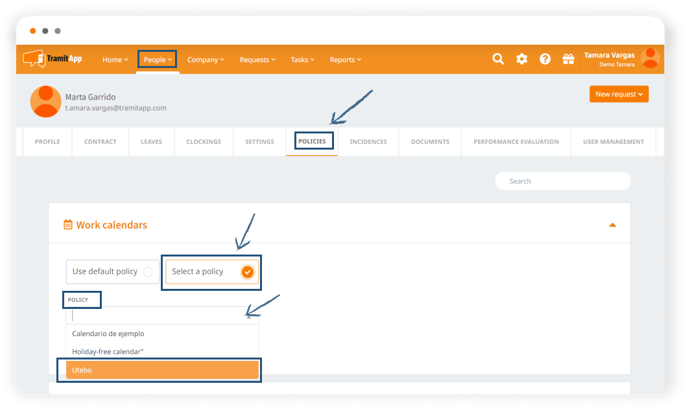
We can establish it at the employee level, within each employee's profile: to do this, we enter the profile of the employee in People > Policies > Work Calendars. We see that the default policy of the company is assigned. If we chek Select a policy, we can select from the ones that have been created, and in this way differentiate within the template of workers who have one calendar or another.
