
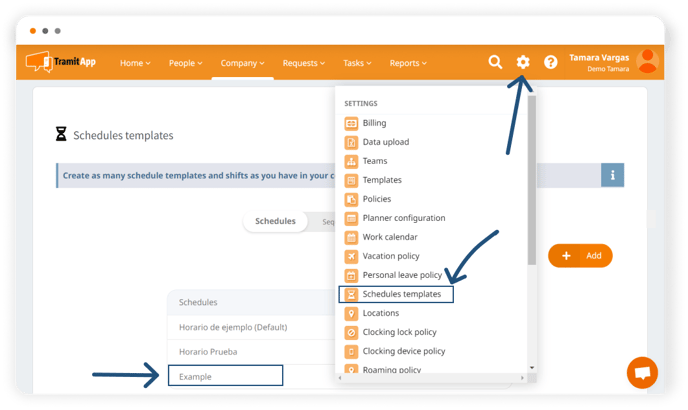
Let's take a look at how to inform about breaks in a schedule. We can follow these same steps in a schedule, sequence, or shift where we want to define a break within the employee's workday. To do this, go to the icon located in the upper right corner of the Settings⚙️ wheel > Schedule Templates, and click on the schedule template in which you want to define the break.
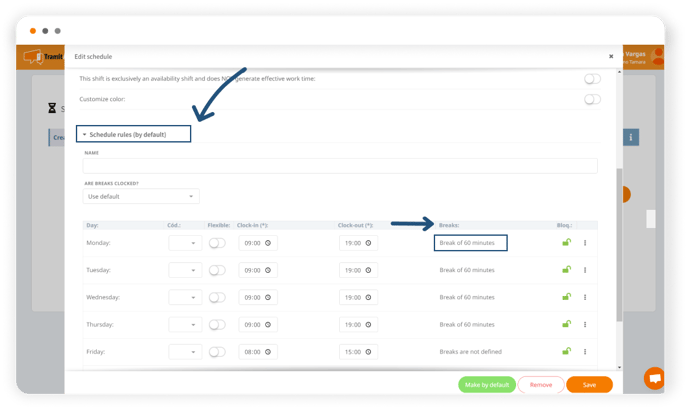
Expand the Schedule Rules and click on Breaks. First, you can define the number of minutes for the break. If you check the box, you can specify the time range during which this break should take place. If you activate the checkbox and define a range, the platform will display informative alerts in the quadrant that will tell us if the employee started or finished a break before or after the scheduled time.
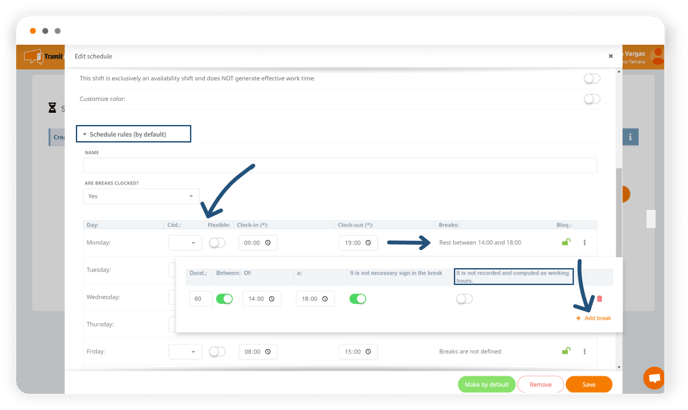
Breaks can be effective or non-effective working time. In the case that it is included in the workday, that it should not be deducted, and that it is paid, we have the option to mark "It is not recorded and computed as woking hours" so that this break is not deducted from the workday and counts as working hours.
We can also set multiple breaks by clicking "Add break." This is very useful if, for example, there are multiple breaks, and they are different from each other.
Options for clock in breaks
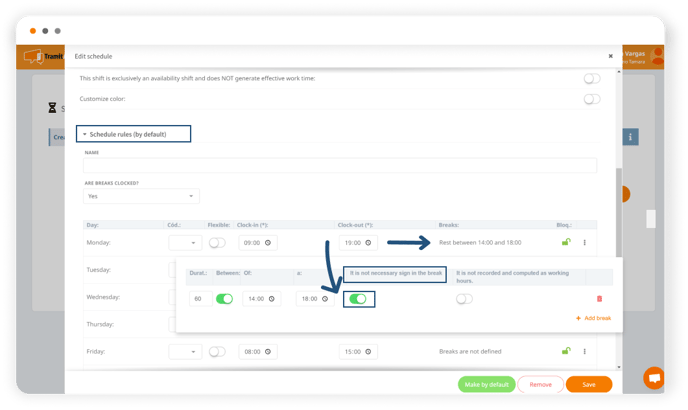
The platform offers the option for employees to clock in and out for breaks, meaning that during the break, they clock out, and then upon returning from the break, they clock in again. Alternatively, breaks can be set to not require clock in, and the specified break time will be automatically deducted. There are three levels for this:
- The first level is the individual level, the strongest level of control, as it is a specific indication within that day on an individual basis. Within the break, by clicking the second checkbox, "It is not necessary sign in the break," we indicate whether this break for this day should be clocked or not: if it's active, it indicates that it should not be clocked, if it's not active, it indicates that it should be clocked.
- The second level is the second strongest, defining a condition for all days within the schedule rules: "no" if breaks are not clocked, "yes" if they should be clocked, and "default" if it should follow what is indicated in the third level.

- The third level is the one that establishes a condition that affects everything that does not have a specific indication. This level is set in the checkbox at the top, "Breaks don't clock": if we click it, breaks will not be clocked, and if it's unchecked, breaks will be clocked.

- Remember to click Save to apply the changes.