
Through the personal leave policy, you can set up your company's annual personal leave time-off bank. The platform will automatically deduct hours from each employee based on their requests. You can create as many time-off banks as needed and associate them by default for the entire company, by workplace, or by employee.
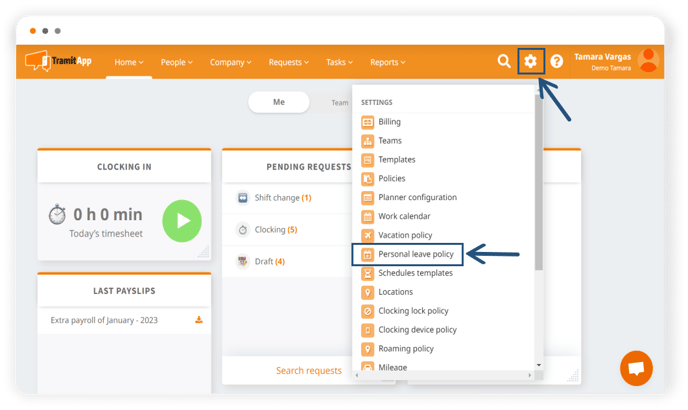
To configure the personal leave policy, we need to access the Configuration⚙️ > Personal Leave Policy section.
In the new window, we can make two different customizations in the General Configuration:
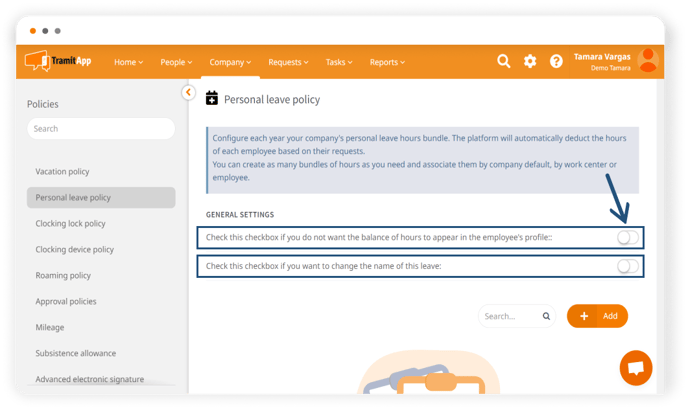
- Hours balance in the employee profile. We can configure whether we want the personal leave hours balance to appear in the employee profile or not. If we don't want it to appear, we should select: "Check this box if you don't want the hours balance to appear in the employee profile."
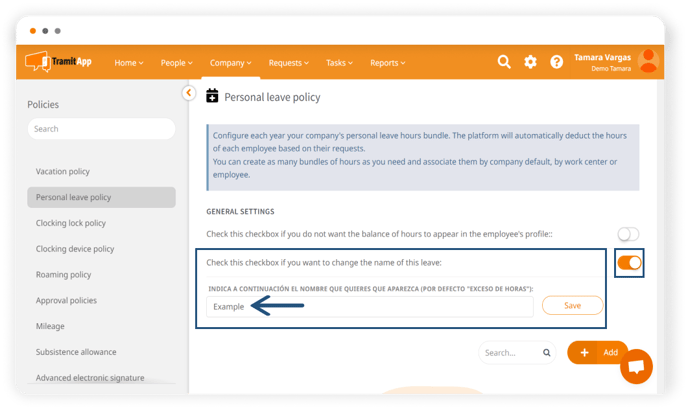
- Change the permission name. The platform allows us to configure a different name for this hours balance if it is referred to differently in our company. To modify it, we should select: "Check this box if you want to change the name of this permission." Then, we will enter the desired name in the text box. If we change the name of the permission, it will be referred to as the name we indicated. Therefore, in Procedures > Absences > Permissions > Permission Type, it will appear with this new name.
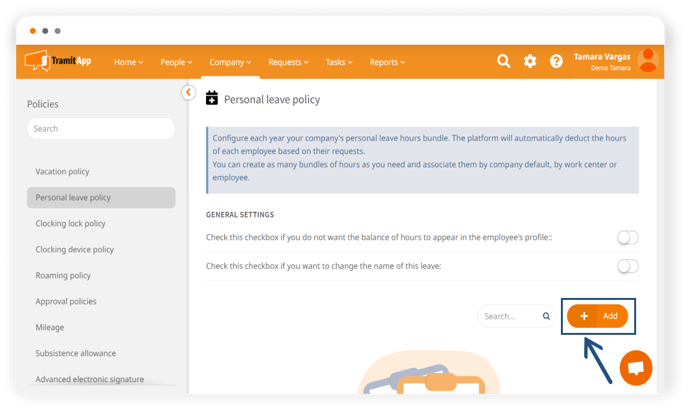
From this screen, we will create a personal leave policy by clicking the Add button.
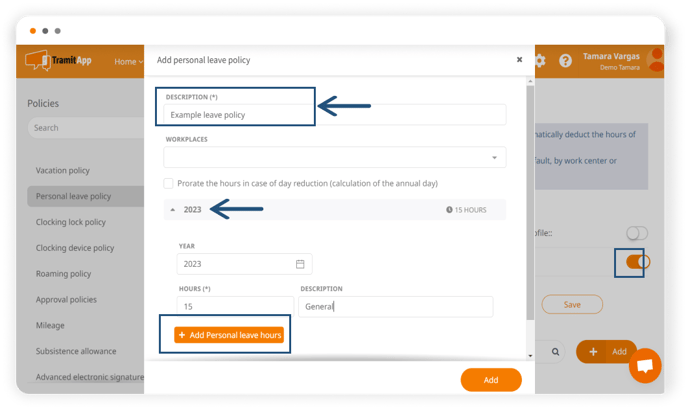
When we click Add, a new window will appear to configure our personal leave policy. In the configuration, we must fill in the description field with a name that identifies it, so it allows us to create the policy. We can assign this policy to a specific workplace so that all employees belonging to this workplace share the same policy. If we don't select a workplace, this policy will be assigned to all employees by default. Later, we will see the options we have to assign this policy.
We click on the current year to expand the options and set the number of personal leave hours we want to assign to the policy along with a description. If we select the Add personal leave hours button, we can assign different time-off banks to different descriptions. For example, we can create a time-off bank for medical reasons and another bank for general personal leave without justification. We should keep in mind that even though they are different items, the process will deduct the total number of hours from a single bank as indicated.
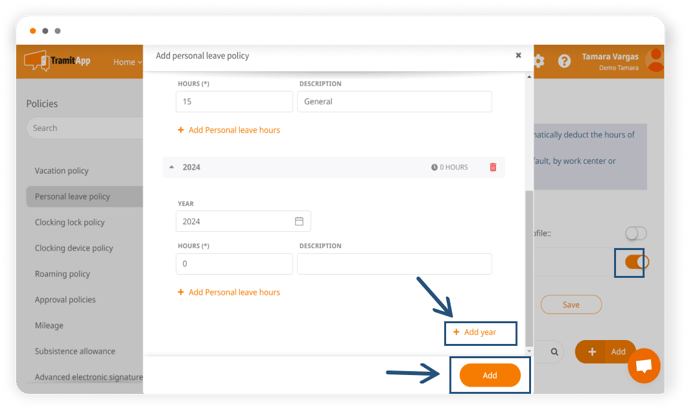
Using the Add year button, we can establish additional years to configure our policy, specifying the year and adding the hours in the same way. To finalize the process, we click Add.
➡️ Unused personal leave hours do not automatically expire from one year to another. If you want these hours to expire, please contact the Customer Success team.
Options for assigning the personal leave policy
Once the personal leave policy is created, there are several ways to assign it:
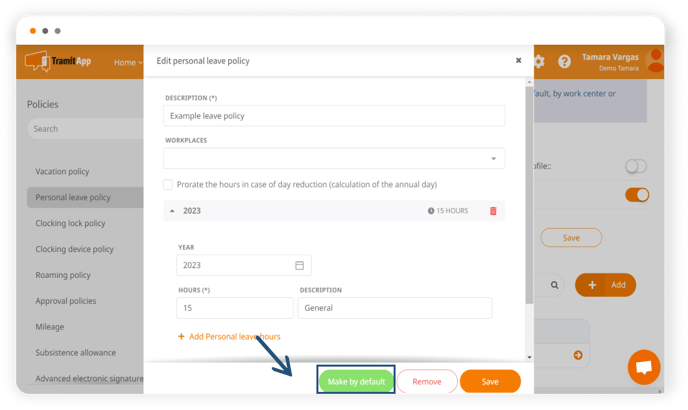
- Set it as the default policy. If we want all users in the company to have the same policy assigned, we need to click on the corresponding policy in the personal leave policy list and select the Set as Default option.
The first personal leave policy we create in the platform will be set as the default for the entire workforce. We can modify this by clicking on it and selecting Remove Default if desired. - Assign it to a specific workplace. As we mentioned before, when creating or modifying the policy, we can assign it to one or several workplaces by filling in the Workplace field in the configuration. This way, all employees belonging to this workplace will have this policy assigned, replacing the default policy.
- Setting it at the employee level. By accessing the profile of the employee in question, we can assign them the personal leave policy we want. To do this, we go to the People tab > People List and click on the employee we want to assign it to. In the top tab, we select Policies and go to the Personal Leave Policy option (or the name we have designated in our company). Here, we should uncheck the default policy and select the one that should be assigned to this employee. This way, we differentiate within the workforce who has one policy or another.