
Shift codes allow us to schedule quickly by helping us to use the planner more efficiently. To do this, we can schedule through codes by inputting directly from the keyboard and it will even help us create schedules and sequences using codes so that all schedule information is directly transferred.
How to create the codes
To create the codes, we will go to the Settings wheel > Schedule templates.
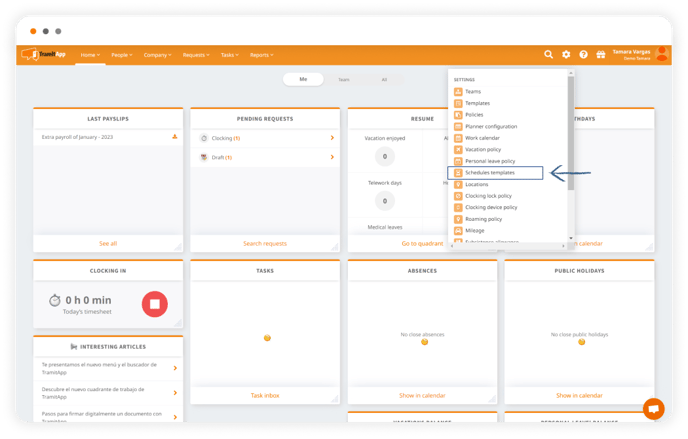
Within this section, we will access the Codes tab and from there we can create as many codes as we need by clicking on the Add button.

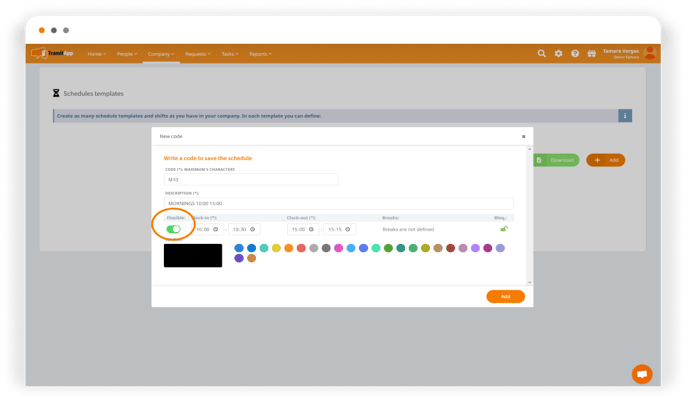
In the next window, we will indicate the name of the code that will help us identify all the information for this shift in a simple way. For example, we are going to create a morning shift, in this case we will call it "M10". We can also add much more information to find the complete description indicating the corresponding working hours range for this shift. For example: "MORNINGS 10:00-15:00".
In this section, we can grant flexibility by checking the green button, adding an input or output range. Or, on the contrary, we can make a fixed shift by indicating the start time and the end time.
We can also add the corresponding breaks, setting the number of minutes that belong to the break. Breaks can also be delimited by adding a start time and an end time when the break should take place. Similarly, we can indicate if the break should be checked or not and if this break is considered effective time or not, that is, if the break counts as part of the working hours. Finally, we can block these shifts by hours or duration, indicating the number of hours that must be worked in that shift.
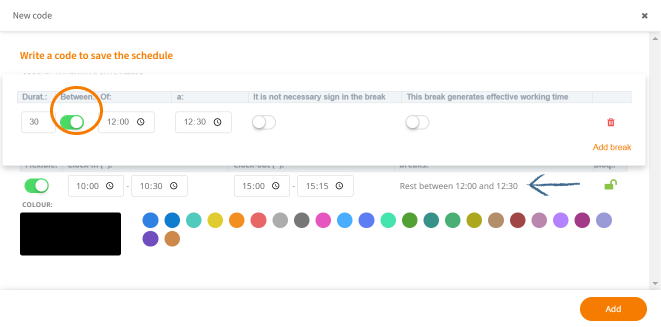
Don't forget that you can indicate a specific color for that shift to make it easier to visualize when we see in the schedule which workers have this code we have created.
Once we have established everything we want to do with this shift, we will review it before clicking the Add button. This way it will be part of our list where we will have all the codes we have created. This will allow us to schedule much more quickly directly from the planner or even create our own sequences or schedules quickly. To do this, instead of completing all the parameters we have seen a moment ago, we will simply fill in our codes and the rest of the information we have added to the code will be applied, that is, what this code means. In this way, we can schedule and generate templates quickly and efficiently.