
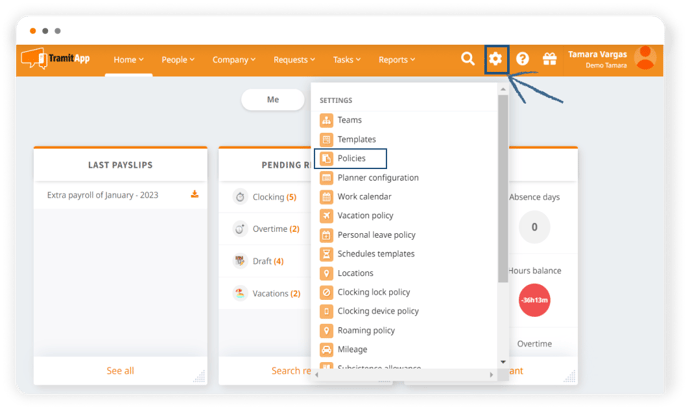
To ensure that employees cannot clock in outside of their working hours, the first step in TramitApp is to create a time tracking block policy. Once created, we can go to the schedule, sequence or shift and configure the necessary blockout. To block our schedule in TramitApp, with our session logged in, we need to access the ⚙️Settings wheel > Policies > Clocking Lock Policy.
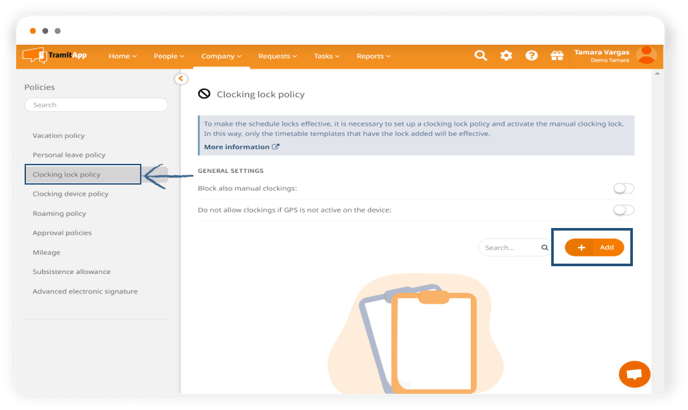
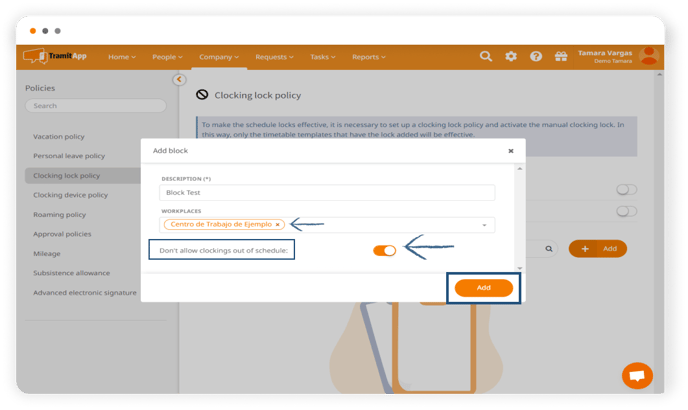
Here we will take the first step which is to create a time tracking block policy by clicking "Add". We give it a name (Blockout Test) and activate the "Don't allow clockings out of schedule" flag, so that clocking cannot occur outside of the blockout that we set next.
After clicking Add, the policy will be created, and we will see that it is "default." This means that it will act on all employees and all schedules, sequences or shifts that have a blockout set within them.
We also have the option to associate the policy with a workplace, so that it will be associated with all people who are part of that workplace, so that if the people in that workplace have a schedule, sequence or shift with blockouts indicated in the schedule, they will be blocked.
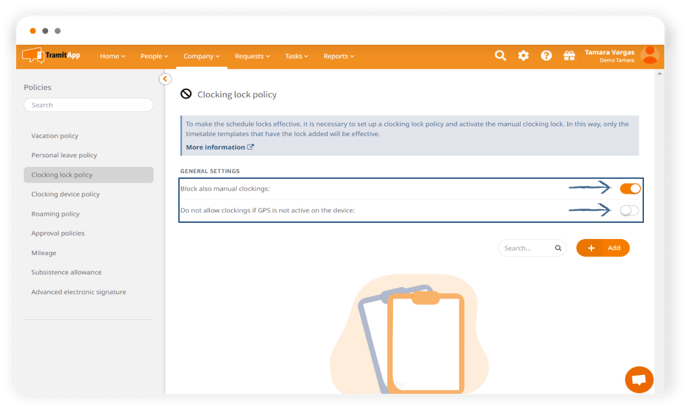
On this screen, we can tell the platform if we want the blockout specified in the schedule, shift or sequence to also block manual employee clocking, or if the platform should not allow the employee to clock in if the GPS of the device the employee uses to clock in is not active. That is, the employee cannot clock in if the platform cannot geolocate them because the GPS is turned off. If necessary, we click on "Do not allow clockings if the GPS is not active on the device".
Types of Clocking Lock
Once we have created our time tracking block policy, we will see the two types of blockouts that exist: to do this, we access the⚙️Settings wheel > Schedule templates.
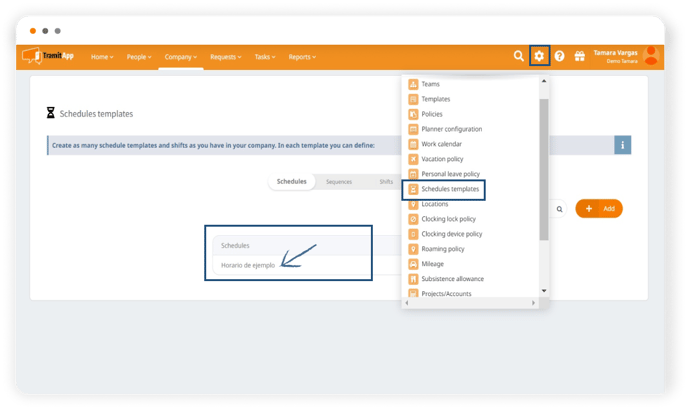
We open the schedule template in which we want to apply a blockout and unfold the schedule rules. Here we see the green lock, which means that there is no blockout applied to the schedule. To access the blockout, we click on the lock: we see that it indicates that clocking is allowed at any time. To block it, we click on one of the two available options:
- Block by duration will limit clocking by duration. This type of time tracking blockout will allow us to set a grace margin from which our clocking will require approval. That is, set a maximum number of hours that can be worked per day (six or eight hours, as defined by our schedule) and once we have exceeded that time and the number of minutes indicated in the blockout (which can be any number, by default it is 15 minutes), our clocking will automatically require approval from the supervisor. What we do with these minutes is add a few minutes to give employees more flexibility when signing in.We're going to change the margin to "10", every day.
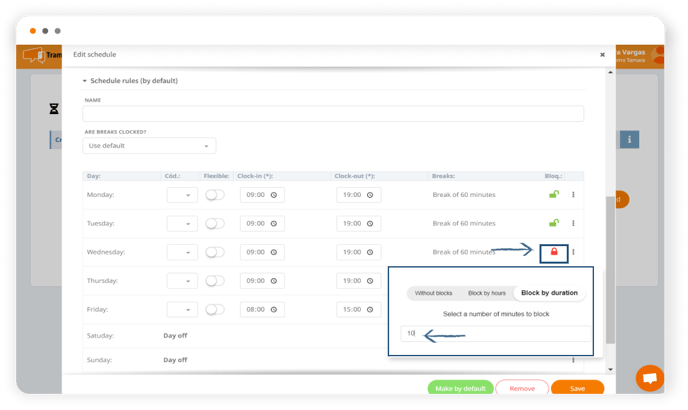 To save the changes, we click on Save and we now have a lock applied to all people who have this schedule template and have assigned a sign-in lock policy.
- Block by hours. Now we'll show the hourly lock on another schedule template. We select the hourly lock, the second type of lock. With the hourly lock limit, we can set the hours when it is allowed to sign in, setting the start time and the end time. This way, we won't allow the employee with this template to sign in before 9:00. When signing in, it will show an error message indicating that signing outside of their schedule is not allowed. On the other hand, it does allow signing out to prevent sign-ins from remaining open from one day to the next, and if it goes past that hour indicated in the lock, the sign-in will also require approval.
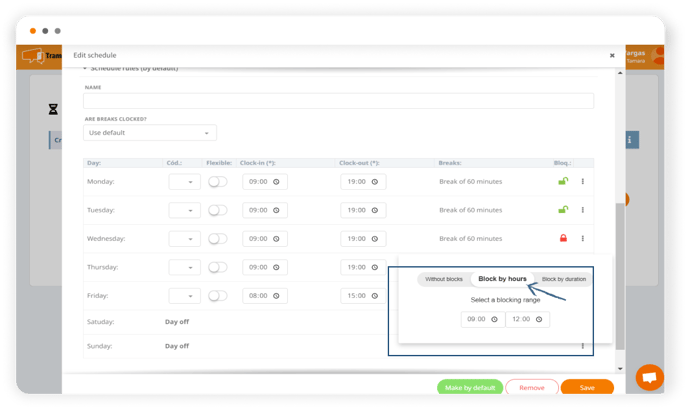
We then inform about all the days when we want to apply the hourly lock and we will click on Save to save the changes.
These two types of locks can be set for any type of shift (schedules, sequences, or turns) both from the templates and from the roster. You just have to access the lock of each type of shift and set the lock you want.