In this article you will learn how to input shifts by individual needs or in bulk, through the creation of templates by needs.
How to create staffing templates for scheduling our employees
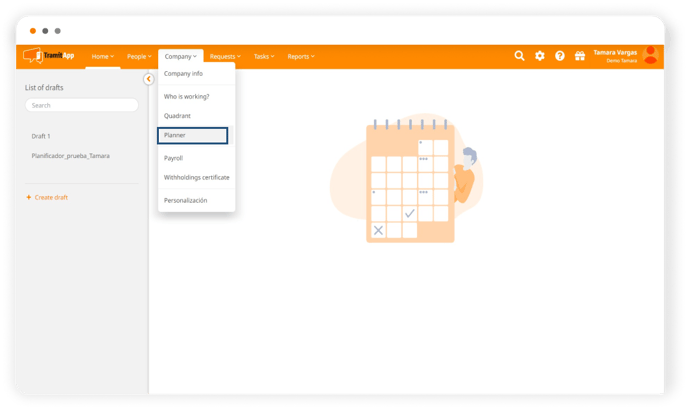
We will access the Scheduler from the Home button. From here we will find the list of created drafts or the possibility of creating new drafts through the templates we will see now.
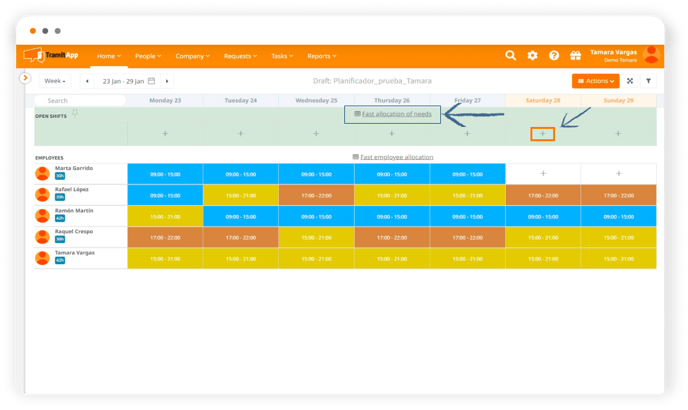
We can access the draft we already have and access to Fast allocation of needs that we will find in our open shift board. The staffing needs can be created individually from the + button we will find on each day.
We going to indicate what kind of staffing need we need to cover around the position, location and schedule in which that need takes place so it can be covered by an employee. We can use the codes we will have saved beforehand so we don't need to fill in the start and end times, we can also indicate the location and the position that will be covered, even what skills are needed to cover that need.
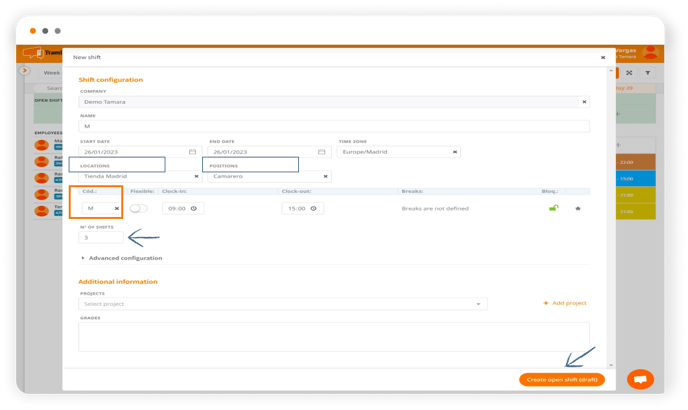
Once the fields are filled in, we can Create our open shift which will be reflected on the quadrant board.
Create Staffing Templates
We can also create staffing templates that will allow us to create all these staffing needs to be covered en masse and much more quickly. To do this, we access the Fast allocation of needs section of our scheduler.
From this section we can access a previously saved template or create a new configuration to create a new template. 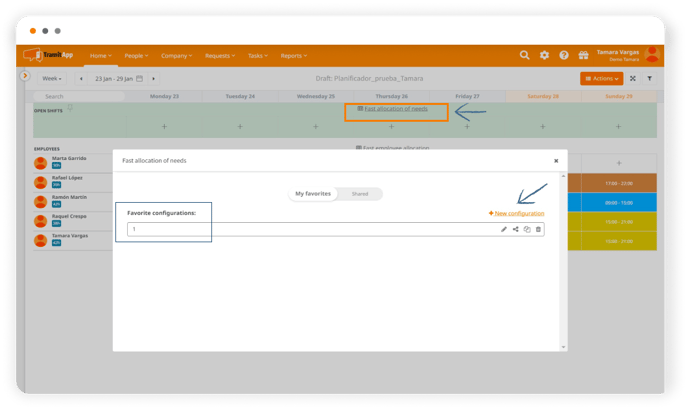
In this section we will have to fill in the different scheduling parameters:
- In Tabs. We will start by scheduling by locations, that is, each location of our company will be a tab of that board.
- Tables. They will be all those mini boards within which we will schedule. We will schedule by shifts so that it creates a location in each tab and a shift to be filled in each table.
- Rows. They are the positions to be covered, indicating how many needs of those positions we need to cover in those shifts of each location.
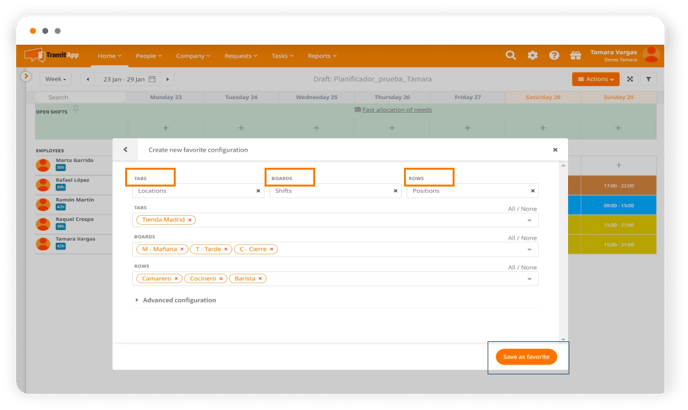
Finally, we have to evaluate what type of information we want to see on our board. We can create a single board for a single location, for a single shift or for a single position. Or we can also have a combined table that allows us to generate all those needs we want in one go. We can add skills corresponding to the position we have chosen to this template or I can even divide it by projects.
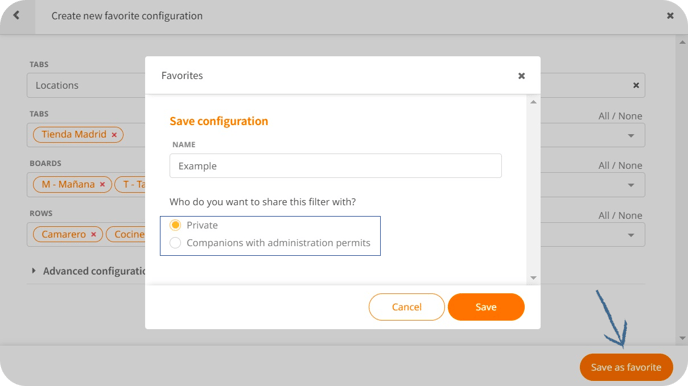
Once everything is ready, we will save it as a favorite, giving it the name we want that will help us identify it, making it private for us or sharing it with colleagues who have administration permissions.
Inputting staffing needs from the keyboard
From here, with our table, we can start inputting those staffing needs through the keyboard. In such a way that with the keyboard we can start placing all the staffing needs we need to cover from this particular shift. Additionally, we can go one by one, drag and copy and paste (Ctrl C - Ctrl V). Therefore, through the keyboard, the number of needs would be indicated.
- For example, if we find that for a position it marks 1/1 means that we have already covered this need previously from the draft already created. Therefore, in the input of these open shifts, a new one would not be created in this case because we are indicating that we need a person for that position and we already have a person assigned.
- On the other hand, if the value is, for example, 0/1, the open shift need is created, since we have 0 values at the moment in the draft.
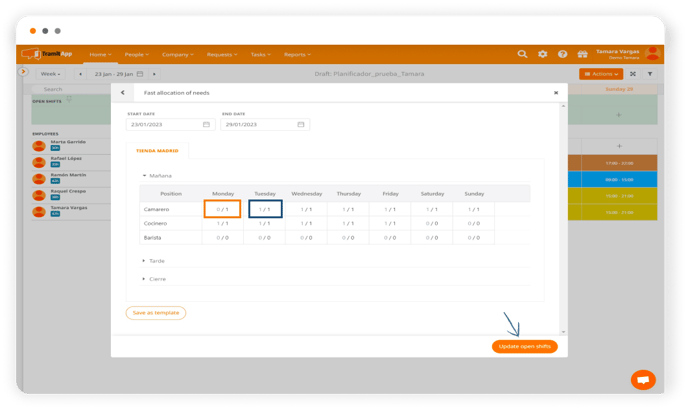
By clicking on Update open shifts, they will be generated and created in the open shift board. We can also click on Save as template to generate all these needs and leave them saved in the board and the need template that we have corresponding to the reception template. Saving these templates helps us to easily refuse by modifying these needs that we have set up. Or, on the other hand, if I save the template itself with the already created needs, we can move it to dates and apply it to the next week or month. Once we have selected what we want to generate, we give Update open shifts so it creates them.