
In TramitApp, you can add as many locations as your company has offices or work centers. Additionally, with Smart Planner, you can schedule work shifts based on those locations and the workers associated with each one, making planning faster and simpler!
To create locations, we must access to Company and scroll down to the Locations section. Expanding this option, we will find a list of all locations that have been created manually or through an Excel upload.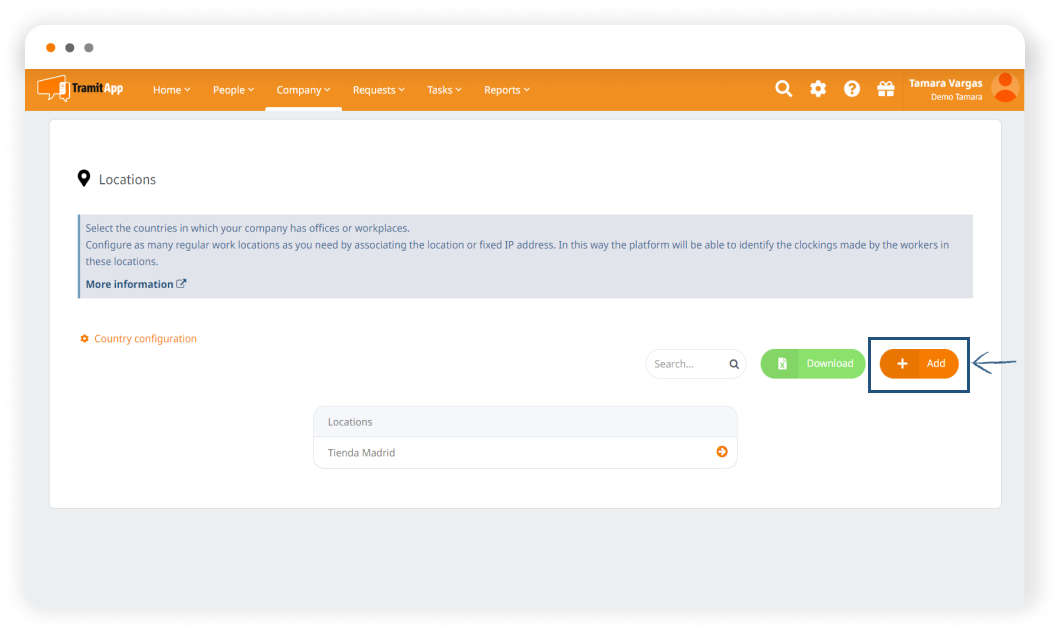
By clicking on the Add location option, we can manually add new locations that will become part of this list. Within this menu, we can assign the name of the location that best helps us identify it for later use in shift planning through our intelligent planner. These details can be checked by employees when viewing their planned shifts to know where to perform their work.
We will also choose the address, placing the cursor where we are located, with a minimum range of 50 meters. By clicking Save, we will have a new location on our list. Within these locations, we can access, modify, or delete them. Once we have the list of locations where shifts can be performed within our company, we will proceed to associate them with employees, so that they can work in all locations or just some.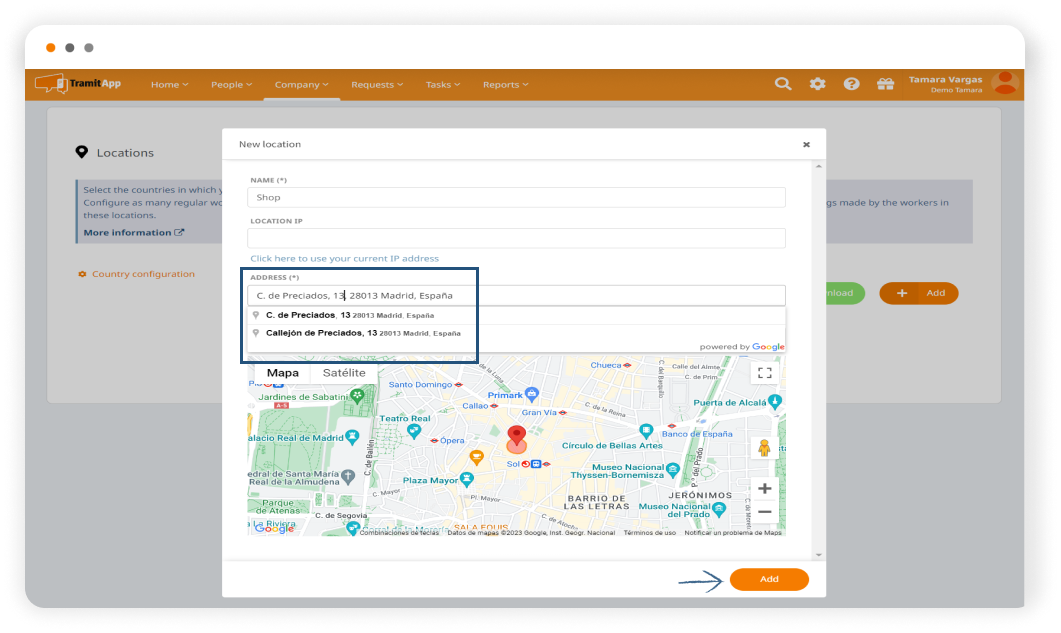
How to assign locations to employees
This can be done from the Excel configuration or manually by accessing a specific worker profile from the People List. Once we have accessed a specific worker profile, go to the Settings option and look for the Locations section.
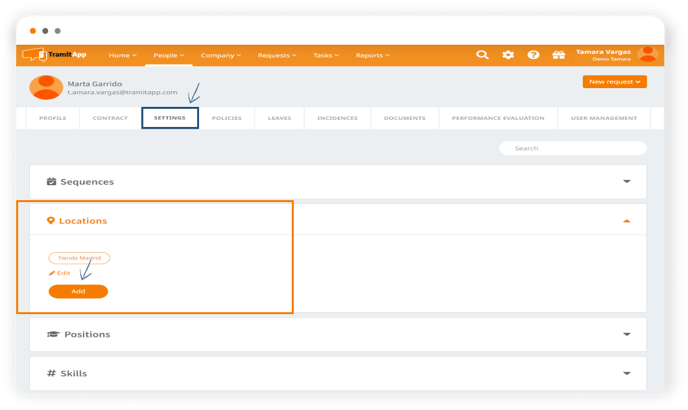
In this section, we can check the locations that have been associated with this employee in the Excel upload, modify them, or if there are none, add them.
To add a new location, we click on the Add button and choose from the drop-down menu among the locations we have created in our company. It also allows us to configure "opt shifts without defined location", this means that when scheduling with Smart Planner, we could associate a shift with a specific defined location and the planner would only suggest those people who can work at that location. If we need to create a shift that is not linked to a specific location, we can also allow our employees to work on a shift that is not assigned to a specific location. To do this, we activate this option, so that this employee can apply for shifts that will be performed at this location and can also apply for those shifts that do not have a specific location.

In case the employee changes their location and there is any type of transfer and the locations in which they can work change, we could historize it. To do this, we would give the option to add and choose a new option, and mark the date from which this new location in which they can work will take effect. In this way, the employee can opt for the planned shifts that correspond to this new location (or multiple locations), from the date we have indicated.