
In TramitApp, it is possible to create as many job positions as you need and assign them to each worker. In this way, you can plan shifts according to these positions.
Discover how to create, modify, or delete job positions and associate them with a worker. For example, you can plan the shifts of a restaurant by configuring how many waiters or cooks you need.
Access the job position configuration in Smart Planner
We must access the Company tab and scroll down to the Positions section. When expanded, we will find the complete list of positions that have been created manually or through the initial Excel load of our company. If the Excel load of our company has been done, we will find the list of positions, if we lack any, we can add them through the add button.
From there, we can add it with the code we want to identify it, the position description, and customize the color that this position will contain, in such a way that when planning the shifts, this shift will have the assigned color. To finish, we give the save button, and it will automatically be part of our position list.
Similarly, we can access each of the created positions if we need to modify or delete those that we do not consider correct.
Assign positions to employees
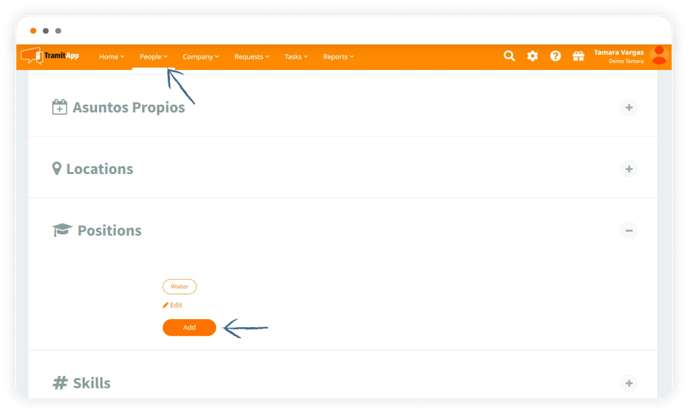
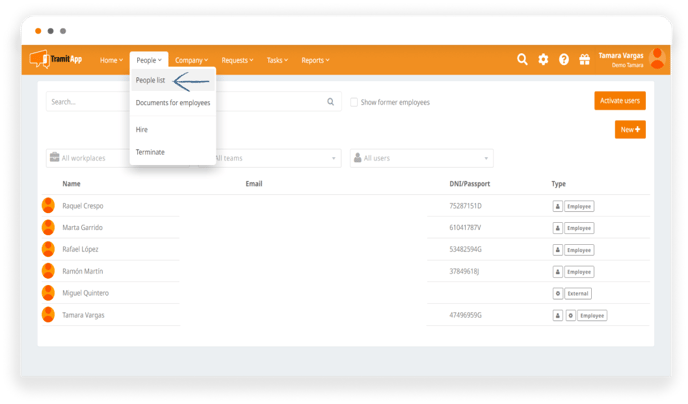
Once we have created the complete list of possible positions in our company, we will assign them to employees. This can be done through an Excel load in the same way as the creation of these positions, associating them with employees, or it can also be done manually. To do it manually, we must enter People>List of people and enter the specific profile of an employee. By scrolling, we will also find the Positions section where we can either check the position that has been assigned through the Excel load or we can assign it ourselves manually.
Assign positions manually
In case we want to assign a position manually, we must first clear the Positions section.
- To do this, we can give it to edit and configure the option opt for shifts without a defined position, which means that when planning shifts, if we do not choose a specific position to perform in that shift we are planning, it will allow employees who have this option configured to opt for that shift. If they do not have this option activated, those employees will not be able to opt for a shift without a specific designated position.
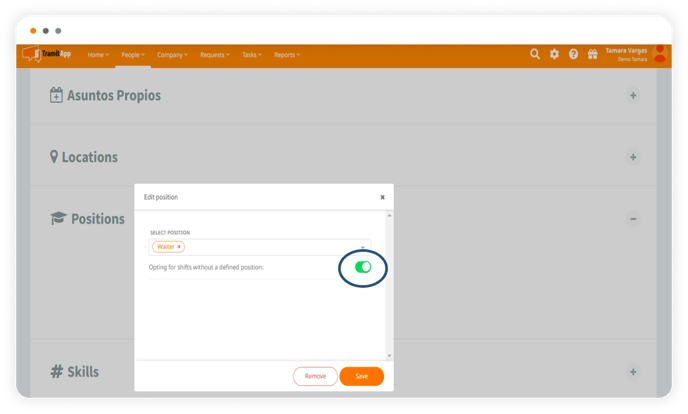
- We can also edit the position if it has been a mistake, and expand the "select position" section to mark another.
- Or we can delete the position completely that exists in that employee. This will allow us to add a new position by following the same procedure.
Once we have saved the positions, we can also historize these positions. So, if an employee changes jobs, we can historize it from a certain date. To do this, in Positions, we would give the Add button, we would add the new position that the employee will have and from the start date that will be taken into account. This will make it so that when planning shifts, when we put the specific position, from this date, it will already propose this employee as a possibility to fill this new position. In this way, when saving it, it will appear in the Positions section the historization of that job position and the historical of the different positions that the employee has covered with their respective start and end dates.