We show you how to request a mileage expense through the TramitApp web and app.
Mileage expense on the web
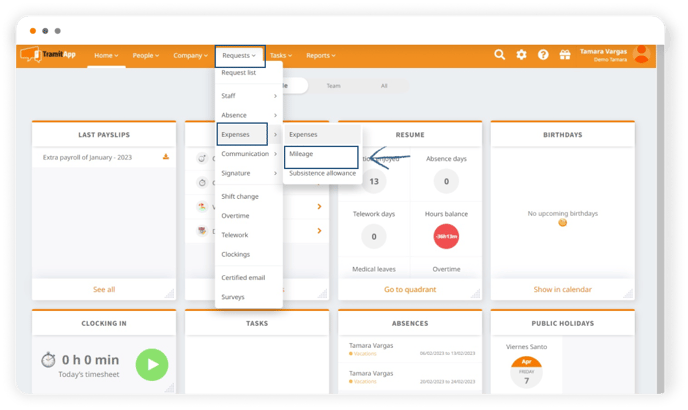
Let's see how to create a mileage expense from the web. We access Requests > Expenses > Mileage.
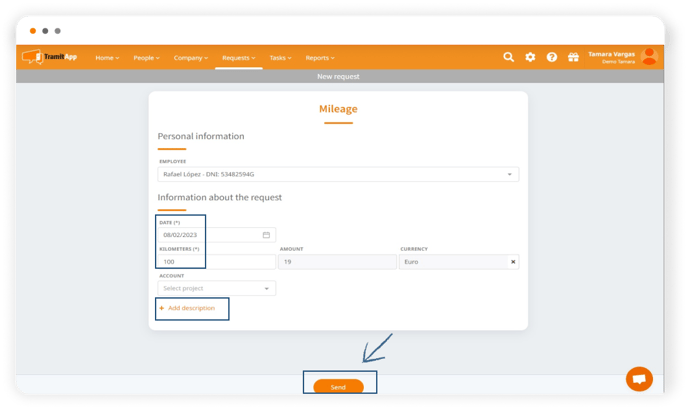
Once here we will complete the data taking into account that those marked with an asterisk are mandatory, otherwise it will not allow us to save the procedure. We select an account in the case that the mileage expense must be charged to an account or project, we can choose one from the drop-down. We indicate the start date, the kilometers we have traveled, and it will automatically calculate the amount based on the company's mileage policy. It also gives us the option to add a note in the description field. We click on Send and our mileage expense procedure would be created.
If we access Requests, the requests list tab expenses, we can see the mileage expense procedure that we just created pending validation.
Mileage expense in the app
Next, we will see these same steps but through the app, we access the TramitApp Employee app. We click Requests on the menu > click on the ➕ symbol >Mileage.
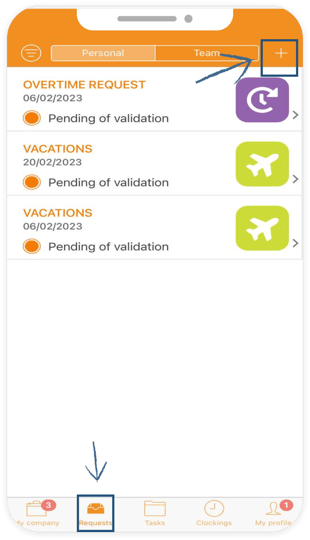
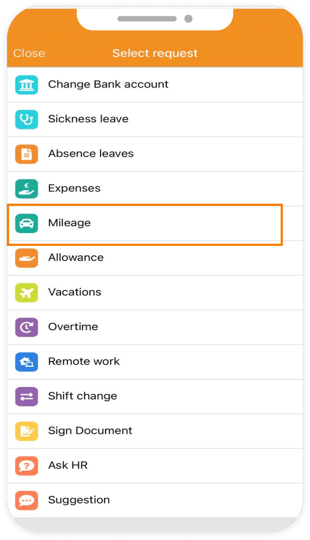
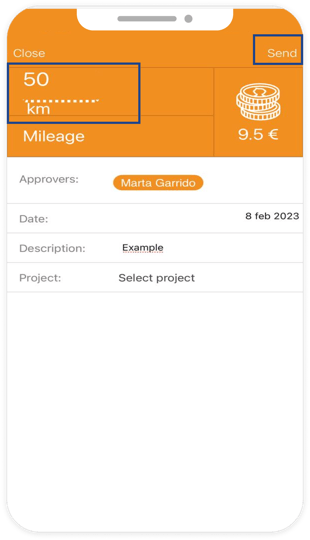
Now, we can complete the data in a similar way to how we did it on the web. We enter the number of kilometers traveled and the amount will be calculated automatically, it will be shown on the top right. We indicate the date, the option to select an account or enter a note. We click on Send, at the top right and it will show pending validation just like on the web.
If we want to review the procedures in the same way, we click on requests, the request list tab expenses, the procedures both those performed through the web and those performed through the app.