
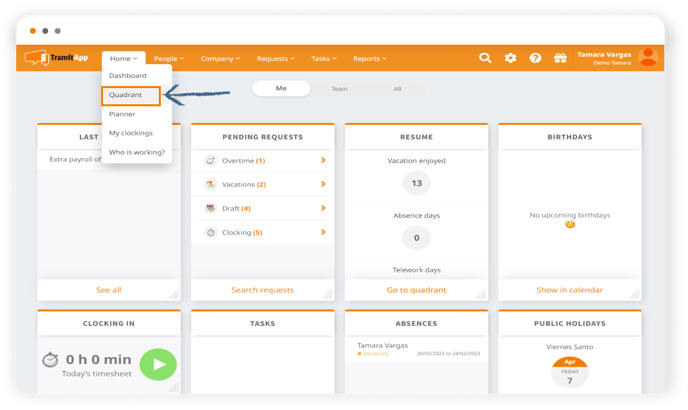
To create a sequence from the dashboard, we access the TramitApp platform and click on Home > Quadrant.
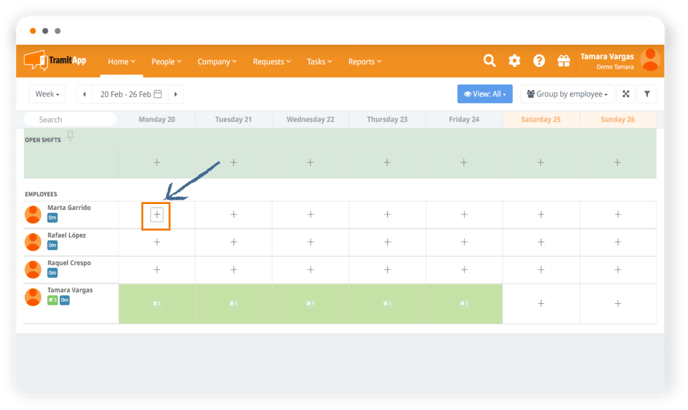
Here we will locate the employee. If they do not have any assigned schedule, sequence or shift, a blank box will appear. We click on ➕ symbol, on the employee's line.
We are located in the "Schedules" section. Among the available options, we clicked on "Rotating Shift" because we want to create a sequence where we inform that this worker will have shifts: one week in the morning, one week in the afternoon, and one week at night, repeating over time.

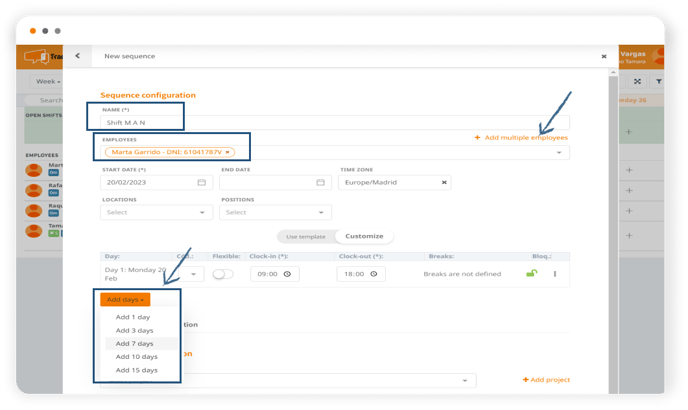
We indicate a name, for example, "Shift M A N". If other employees also have this sequence on the same dates, we can indicate it in this field. If we click on "Employees," it shows us the employees on the staff, or we can click on "add employees massively." We check that the start date is correct since the sequence will indicate which day of the calendar it will start. We will indicate an end date if we know when the sequence ends; if it should continue over time, we will leave this field blank. We click on "Add Days" to display all the days of our sequence.
We inform about the days: the first week of mornings, from Monday to Friday from 9 am to 3 pm, on Saturday and Sunday, we indicate that they are days off by clicking on the three dots > make them rest days. The following week is in the afternoon, from 3 pm to 9 pm, also on Saturdays and Sundays as days off. The following week, for example, at night, from 9 pm to 3 am, Saturday and Sunday off. It is important to remember that we must indicate all the days, including weekends, and following the order of days: if the sequence starts on a Monday and we want it to repeat week after week, it will end on a Sunday. If it starts on a Wednesday, it will have to end on a Tuesday, etc., since once the cycle ends, it will start again, beginning with the schedule we indicated on day 1. We can also inform the schedules of this sequence through codes.

In the post "How to create schedule shifts by codes," you can see the steps.
We click on "Create Sequence," and it will be established on the schedule from the indicated date. One week in the morning, one week in the afternoon, and one week at night, and the following week, again in the morning, etc.
Advanced configuration
If we click on "Advanced configuration," we can define other aspects such as if we want it to replace a schedule if, for example, the employee has an established schedule and the sequence must replace/override the schedule on these dates, if this sequence should not be applied on holidays, if the rests in this sequence are not clocked out, and the time is automatically deducted.
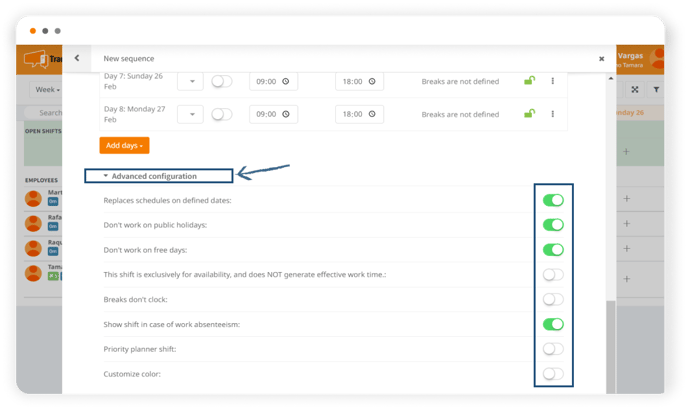
When configuring a sequence, the platform offers several customization options:
- Rest breaks are not clocked out: By selecting this option, breaks are automatically deducted without the need for employees to clock out.
- This sequence is exclusively for availability, and does NOT generate effective working time: By selecting this option, it becomes an availability sequence (such as a localized guard shift) so that employees can clock in if needed.
- No work on days off: By selecting this option, the sequence will not mark as working those days that have been designated as days off, for example, due to vacation policy.
- No work on holidays: With this option, the sequence will respect holidays. Replaces the schedule on the defined dates, the sequence prevails: So if the employee had a schedule assigned, the sequence prevails during the period in which it is active.
- Customize the color: By adding different colors to the sequences, you will make your company's dashboard more visual.