Create projects or accounts on the platform
Create the projects or accounts that you have in your company, so that employees can allocate their recorded hours or expenses to the different projects they are involved in.
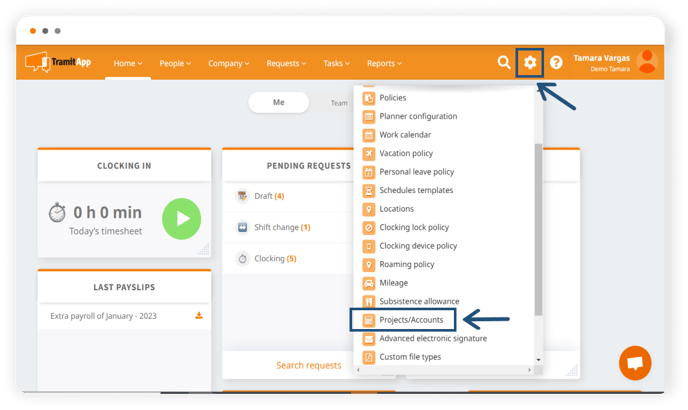
To create a new account or project in your company, we need to access the Configuration ⚙️ > Projects/Accounts.
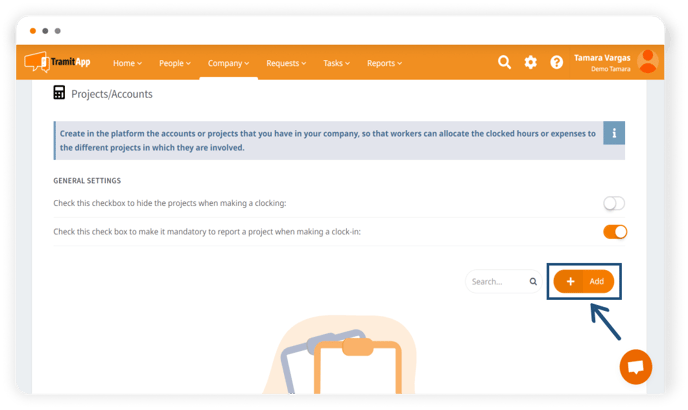
In the new window, click on Add to establish a new account or project.
When creating a project, we must fill in the following fields:
- Description. Add a name that describes what the project consists of.
- Project code. Set a code to easily identify the project in question.
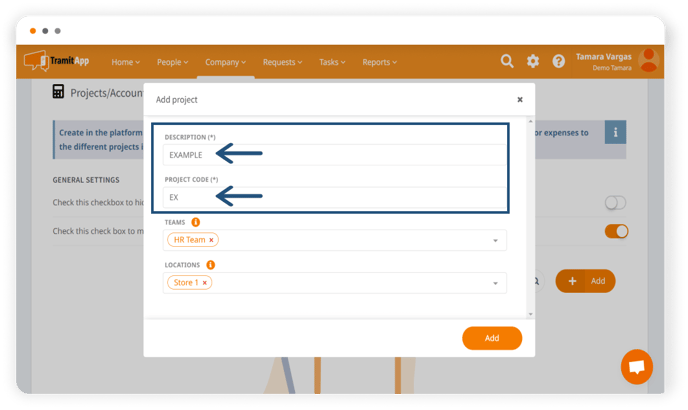
We can also optionally specify if we want this project to only appear to specific teams or locations. These two fields (Teams and Locations) are not mandatory. Therefore, if we don't add anything, the project we create will appear for the entire staff in general.
- Teams. You can specify which team or teams are part of this project. This way, only members of specific teams can allocate hours or expenses to this project. Here you can see how to configure teams in TramitApp.
- Locations. You can add the previously created locations in your company where the project will be assigned. This way, only employees who record their time at a specific location can allocate hours or expenses to this project. Here you can see how to add a location.
Review the fields and click on Add to create the project. Once created, it will be added to the Projects Listing section, where all the projects we have created in our company will appear.
How to assign a project to a clocking
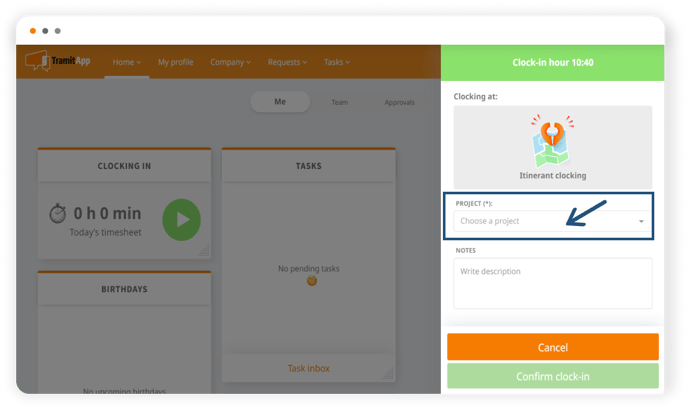
We can configure whether these projects should be displayed when an employee (with one of the assigned projects) is about to record their working hours. This way, the company can have better control over the hours its employees dedicate to each project.
- Check this box to hide the projects when clocking-in. If we check this box, employees assigned to a project will not see the projects when they record their working hours.
- Check this box to make it mandatody to report a project when clocking-in. If we check this box, employees must obligatorily assign the project they are recording their hours for. Therefore, if we have this box checked and the employee does not indicate any project in their time record, the tool will not allow them to record it.
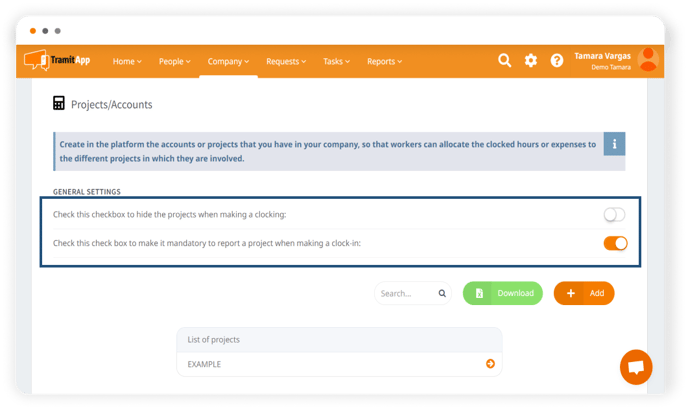
This way, if we have configured it this way, when an employee is about to record their working hours, they will see the "project" field before confirming their entry. And if we have made it mandatory, they will have to assign which project they are recording their working hours for.
 Download the list of projects
We can obtain a report in Excel format that will include all the projects of our company, with the different fields we have assigned to each one.
To download it, we must go to the same Configuration ⚙️ > Projects/Accounts screen and select the Download button.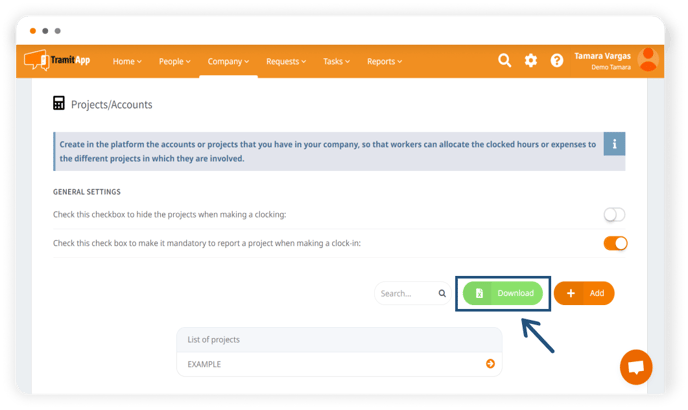
How many hours have been clocked-in per project
If we want to know how many hours one or several employees have been clocked-in for a specific project, we can consult this in the Quadrant Report. To do this, we access the Reports tab > Time & attendance > Quadrant. We set the filters and select the columns we need, making sure to mark the Projects column. We click on the Download button and we will have our report in Excel format where the hours clocked-in per project will be recorded.