
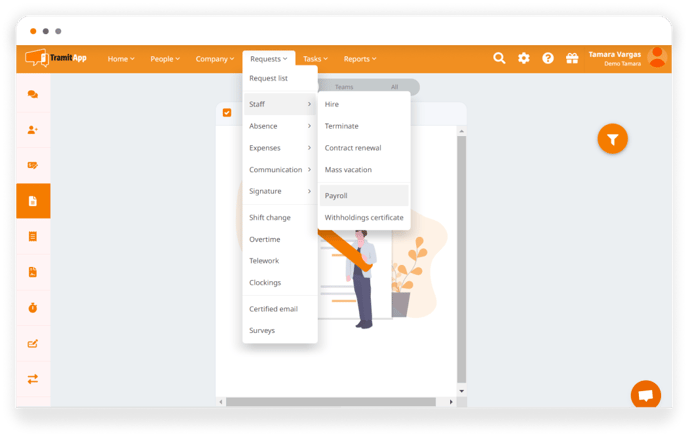
Through the payroll process, we can upload worker's payrolls in a single and combined PDF where the platform will take care of placing each payroll in the profile of each employee. In this article, we teach you how to manage payrolls, upload them to the application and send them to the workers. To make a payroll process in TramitApp we must look for the option of Request located in the main menu. There we will click on the section of Staff and, after that, in the option of Payrolls (Requests> Staff> Payroll).
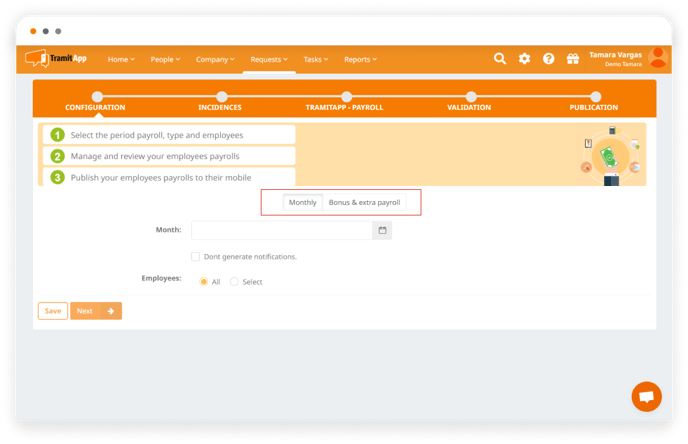
Once inside, we indicate whether it is a monthly payroll or a bonus/extra pay. In this case, we are located in monthly, and choose the month in question. If we do not want a notification of this requests to be generated, we check the checkbox.
Selection of employees for payroll sending
We can indicate which employees in particular to send the payroll to or if we want to send them to all. By clicking on "select", it shows me the list of employees and select the ones I want: in this case, we choose All. Once this is done, we click on next.
Incidents in payroll
In the next step, all the incidents in payroll of each of the employees will be shown. For example, if a worker received a bonus, if we click on him we will unfold all the information. To download the incidents of the employees and review them, we click "here" and an Excel with all the incidents is downloaded.
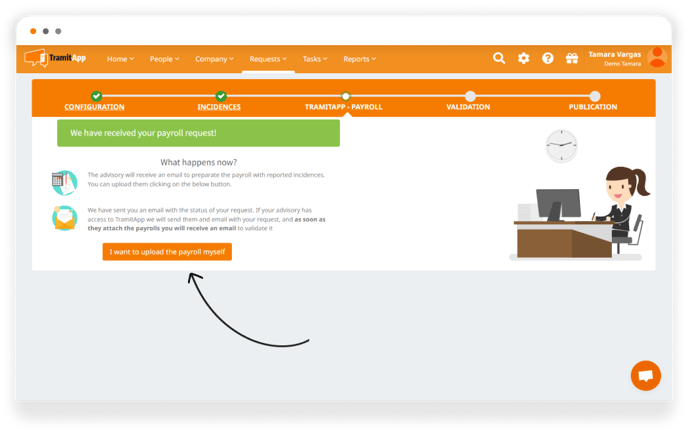
Request for payrolls to the accounting firm
In the option of "request payrolls", if we have an advisory user (that is, if we have given access to TramitApp to our accounting firm), this user will have received an email in which it is informed that the company has requested the payrolls of this month. From here on, it will be the accounting firm who will continue with the management of the payroll requests. Without an advisory user, we must check "I want to upload the payrolls myself" to continue with this management ourselves as administrators.
Upload the payroll document
In the next screen, we must upload the payroll document. To know the requirements of the document, check the additional information that we show in this post. We indicate what type of document it is, in this case, they are payrolls in pdf. We click on "Upload documents" and wait for the process to finish in the top bar: once done, where the system has identified an employee by their ID number it has placed the payroll and will show "not validated". Where it says "no payroll" it has not found the employee's payroll in the pdf and has not placed it.
If we consider that it is not correct that it indicates "no payroll" we must review the document that we have uploaded, that it complies with the characteristics mentioned in the post, and that the ID number informed in the pdf is correct. If this step had been carried out by the accounting firm, an email will be sent to the Administrators indicating that the payrolls are pending validation.
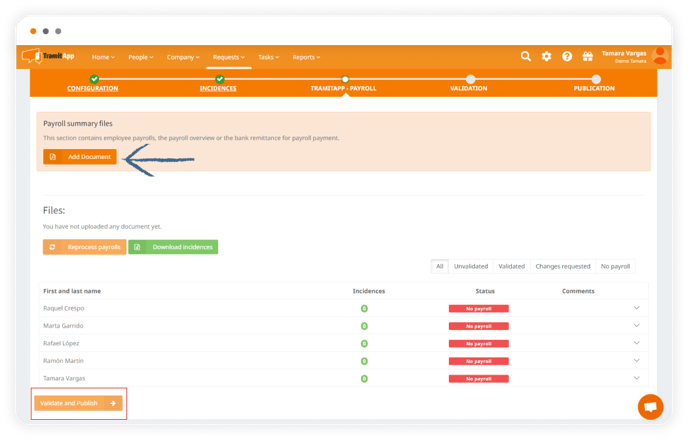
In the case of having uploaded the payrolls directly, we can check that they are all correct and click on "validate and publish." The platform will ask us if we want to continue with this step, if we are sure we mark "yes." At this moment, the payrolls are divided by relating the ID number or passport that is in the pdf of the payroll with the ID number or passport that is in the profiles of the employees in TramitApp. At this moment TramitApp divides the payroll document in pdfs individually and saves it in the profile of each employee that corresponds, so that they can consult it.
Automatic notification to employees
Once the process is finished, employees receive a notification informing them that they have their payroll available. From their TramitApp profile, they can consult it from their device as many times as they want. In the Company tab > Payrolls, there is the uploaded document in the request with all of them.
*The .pdf document with the payrolls of the employees must be at least one, in which all the payrolls of all the employees indicated in the first step shown in the video are included. The document must be in .pdf format, without restrictions or passwords, and always in text format so that the platform can extract the information. The platform will not recognize, for example, a scanned document or an image of a payroll.
*In the case that an employee has two payrolls, it is important that the two payrolls are uploaded in the same PDF, and the system will directly place the two payrolls in their profile, in the Payrolls tab.
Once the payroll request has been completed
Once the payrolls have been uploaded and the request is finalized after completing the entire process, the request can't be cancelled or deleted.
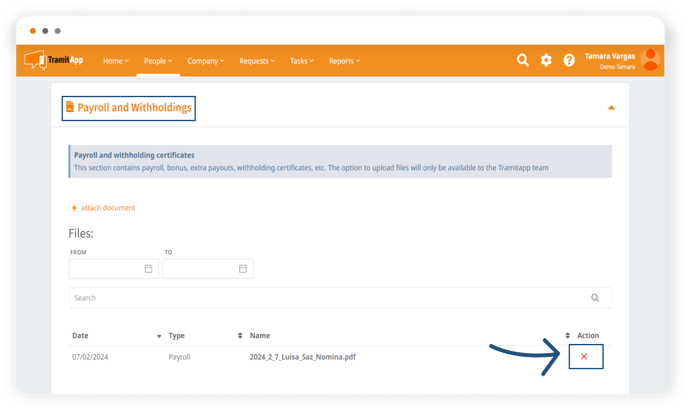
If, once the payroll request is finished, we realize that we have made a mistake with the payroll, we can remove the payroll from the profile of the concerned employee or employees. To do this, we access the People tab > click on the employee's name and, in their profile, we go to the Documents > Payroll and Withholdings section.
Expanding the Payroll and Withholdings section, we look for the document we want to delete (paying attention to its date/name) and click on the cross❌ in the Action column to delete it.
On the other hand, if we have made a mistake in the payroll document for a certain month and it is not correct, we can "replace" it with another one. To do this, we must create a new payroll request following the usual steps. In this way, we will make this new request overwrite the previous one, replacing one document with another.
What to check if the payrolls are not being uploaded?
If we see that the payrolls are not being uploaded, it could be due to one or several of the following aspects that we should review:
- That the ID number on the payroll matches the ID number on the platform.
- That the ID number does not have spaces between the numbers and the letter, neither in the payroll nor on the platform.
- That the ID number does not have the "foreign document" checkbox marked on the payroll.
- That the payroll PDF does not have restrictions, is in text format so it can be read, and does not have a password.
- That scanned payrolls or those in image format cannot be read.
* If we want the payrolls to be signed, the steps indicated in the post How to create a signature process for an employee must be followed.