
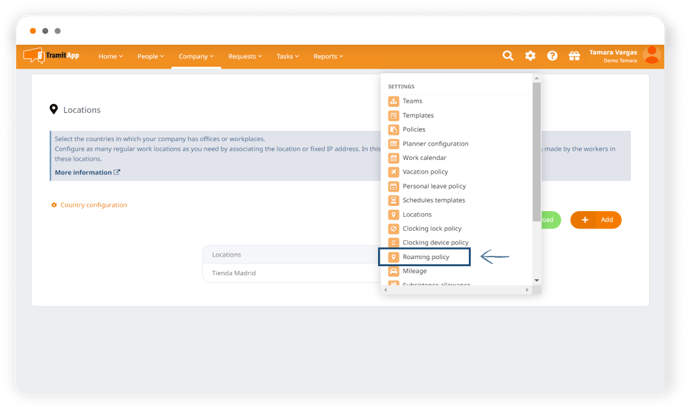
By configuring the roaming policy on the platform, you can restrict the location from which workers can clock in via mobile or IP in the case of web clocking. In Tramitapp, you can configure roaming policies and set the flexibility of locations in employee clocking. To do this, we go to the Configuration wheel > Policies > Roaming Policies. We deploy the sample roaming policy.
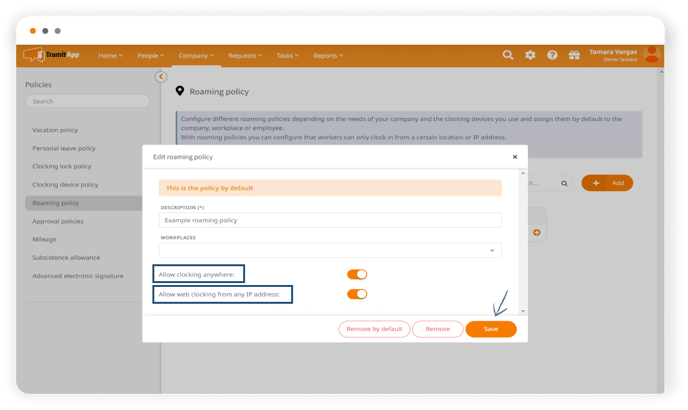
We have two levels of configuration: at the location level and at the IP level.
- At the first level, with the active tab (marked in orange) allows us to clock in from any location, to restrict it we will deactivate it. With the tab deactivated, we are indicating that clocking will only be possible at the locations previously reported on the platform, as shown in the post on Locations. Clockings made within the locations we have established as usual work locations will be automatically approved. While clockings made outside of them will require approval from a responsible person. When the employee clocks in, a message will appear indicating that their clock in requires approval.
- The second level of configuration is IPs. Activating the tab will allow clocking from any IP, and deactivating the check will only allow clocking from the previously reported fixed IPs in the locations. If we restrict the IP from which employees can clock in, when they clock in without being connected to that reported IP, a warning will appear indicating that they can't clock in from the IP they are on.
Taking both levels into account, we can configure as many policies as we need.
Create open or closed policies
If within the template we have a set of employees who, due to their functions, need to be itinerant but the rest of the template does not and we want to differentiate them, we will create two policies: an open one for those who travel and another closed for people who are always in their usual place of work.
- We will create an open policy for itinerant employees: we click on Add, indicate the name that allows us to differentiate them ("Open itinerancy policy - Commercials"), and as we said, we mark it as open with the active check and that it can be punched from any location and from any IP. We click on Add to save the changes.

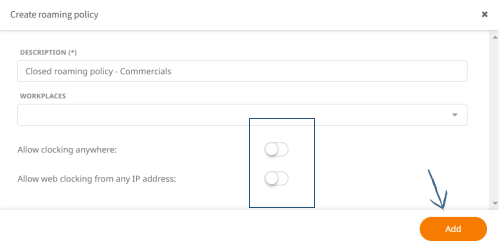
- For the closed policy, for the set of employees who don't roam, the checks must be unchecked. Create the policy by giving it an appropriate name ("Closed roaming policy") and click Add.
How to assign the created policies
We will see how to assign the policies once created.
- We can configure them by default in the company so that everyone has the same policy assigned. If a default policy is active, it will be indicated in the name of the policy and within it.

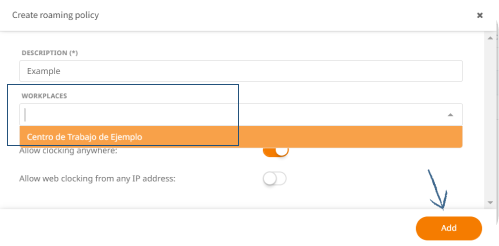
- Then we can assign it to a specific Work Center. In this way, all employees who are part of this Work Center will have this policy assigned, replacing the default policy.
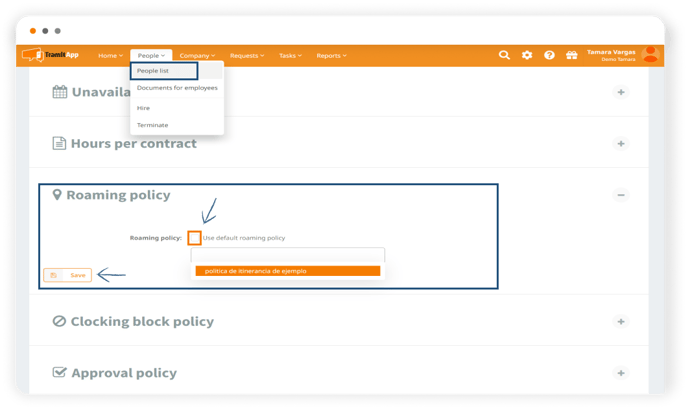
- And finally, we can set it at the employee level, within the profile of each employee: to do this, we enter the employee profile in question: People >People List, click on the employee we want to select > Employee info and deploy itinerancy policy. And we see that it has assigned the default policy of the company, if we uncheck it, we can select from the ones created and in this way differentiate within the template who has an open policy and who has a closed policy. We select Save to make the changes.
👇 Other videos that may be interesting are: