
The first step to set up TramitApp as a time control tool is to upload the employee data to the platform. You may want to configure the profiles of each worker yourself, in that case, you can see in this video how to do an express registration of employees in TramitApp.
But if you have preferred that our team help you with the data loading, the first thing is to check that the employee data is correct. You will also see that, although the workers are registered on the platform, their users have not yet been activated (that is, they have not yet received their username and password to access the platform).
Activating users and sending them their access data is very easy and you can do it yourself, we teach you how in the post Activating users in TramitApp. If you have any doubts you can consult with your commercial advisor.
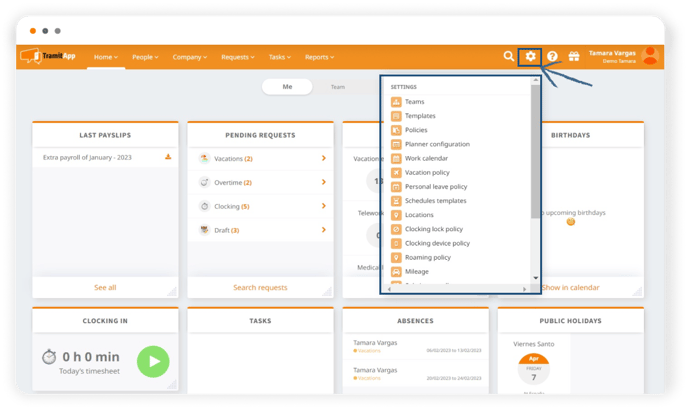
To configure our time control tool, we will go to settings, in the upper right corner of the TramitApp web view. There, we are shown the complete menu with the different configuration options that the platform offers us.
Calendars and holidays
The first thing is to choose the company's working calendar. You can select a calendar for each work center or add your own holidays.
Then, in the vacation policy, you can configure the company's holiday policy (for example, Saturdays and Sundays if your working hours are from Monday to Friday. Discover how to configure the holiday policy in this article.
Setting up schedules, sequences or shifts
Once the calendar and holidays have been configured, we can begin configuring the employees' working hours through schedules, sequences or shifts (in this article we tell you the difference between them).
You can create as many schedules as you need on the platform, block these schedules, input schedule templates from the quadrant or create individual shifts. In our Schedule Administration section you will find all the information you need for the configuration.
Configuring the check-in policy
To continue with the configuration, you have to define the check-in policy that you want for your company. The essential points will be to define the locations, configure the itinerancy of the employees' check-ins and the check-in method that you want them to use.
You can also create projects to which to assign hours in the check-ins. Access Projects/Accounts from the settings.
Teams and permissions
With the configuration of teams on the platform, you can create hierarchical groups by assigning employees to a team and giving each team a responsible. This responsible may have permissions to manage the check-in procedures of the team members.
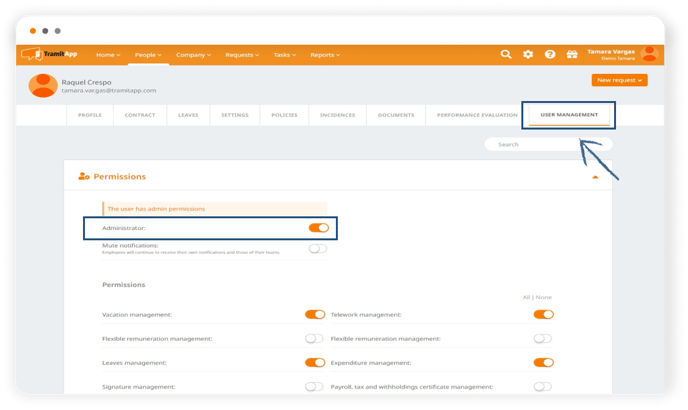
You can configure these permissions in the profile of each team leader, in the User Management section.
Remember that in our Academy you will find all kinds of articles in which we tell you how to check in from the mobile or from the web and all the information you need in the Time Control section. Also consult everything that administrators can do in the Administrators' Transactions.